Maintenance
Updating Agent Zero
Keep your Agent Zero installation up to date with the latest features and improvements.
Self Update (Recommended)
- Open Settings UI → Update tab
- Open Self Update
- Wait for the update checker to see if you have the latest version or if there's an available update.
You'll also be prompted through the UI when a new A0 version is released. Backups are automatically managed internally.
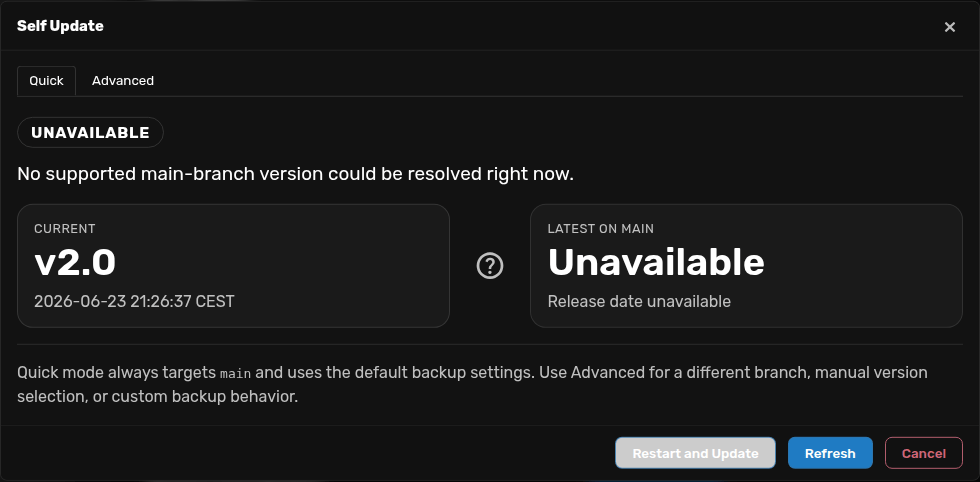
Updating from v1.20 to v2.0
Agent Zero v2.0 starts a new major release line. If your current instance is on v1.20, use a Docker image update instead of in-app Self Update.
Self Update can show that a newer v2.x line exists, but major upgrades require downloading a newer Docker image first.
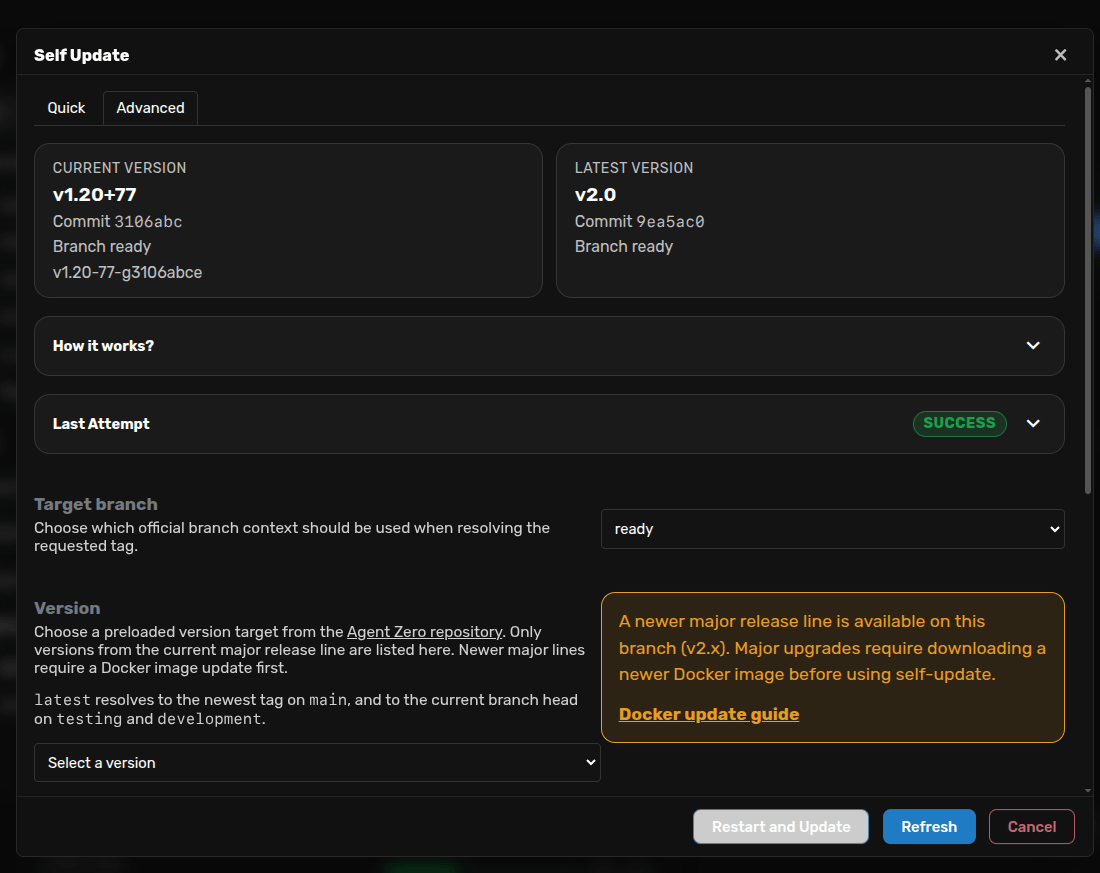
The safe upgrade model is simple: create a backup zip from the old v1.20 instance, start a fresh container from agent0ai/agent-zero:latest, then restore that zip into the new v2.0 instance. For the v2.0 release, latest is the v2.0 image.
Without Agent Zero Launcher
- Create a backup in v1.20: open Settings > Check for Updates > Backup & Restore > Create Backup and keep the downloaded
.zipfile. - Pull the v2.0 image: in Docker Desktop, search for
agent0ai/agent-zero:latestand pull it. In Docker CLI, rundocker pull agent0ai/agent-zero:latest. - Start v2.0 separately: run a new container on a different host port so the old v1.20 instance stays available for comparison.
- Restore the backup into v2.0: complete first-run prompts, then restore the downloaded zip from Settings > Check for Updates > Backup & Restore > Restore Backup.
- Verify before cleanup: check chats, projects, memory, settings, and custom plugins before deleting the old v1.20 container.
docker pull agent0ai/agent-zero:latest
docker run -d -p 50081:80 --name agent-zero-v2 -v a0_v2_usr:/a0/usr agent0ai/agent-zero:latest
With Agent Zero Launcher
- Open Instances, choose the old v1.20 Instance, and use Backup
/a0/usr. - Open Versions, use the latest card, then Install or Run the v2.0 image.
- Return to Instances, choose the new v2.0 Instance, and use Restore
/a0/usrwith the backup zip. - Open the new Instance and verify it before deleting or stopping the old v1.20 container.
Do not bind-mount the whole old /a0 directory into the new container. Keep user data under /a0/usr, use backup and restore, and let the v2.0 image provide the system files.
Updating from Pre-v0.9.8
If you are upgrading from v0.9.8 or earlier, the architecture has changed significantly. You cannot use the in-app Self Update.
- Backup your data: Make a copy of your existing
usr/directory before starting. - Run the new install script: Use the Quick Install script (
curl -fsSL https://bash.agent-zero.ai | bashfor macOS/Linux orirm https://ps.agent-zero.ai | iexfor Windows). - Migrate data: Copy the contents of your backed-up
usr/directory into the newa0/usr/directory to restore your settings, memory, and plugins.
💡 Note: This migration ensures your old data perfectly slots into the new Docker-based architecture.
Manual Update (Advanced)
Use this method only if the self-update feature is unavailable or you need to manage containers manually.
- Keep current container running - Don't stop it yet!
- Pull latest image:
docker pull agent0ai/agent-zero:latest - Run NEW container on different port:
docker run -d -p 50081:80 --name agent-zero-new agent0ai/agent-zero - Backup from OLD instance: Settings → Backup & Restore → Create Backup
- Restore to NEW instance: Settings → Backup & Restore → Restore
- Verify and cleanup: Only delete old container after confirming data is restored
💡 Why This Process? Running both containers ensures you can always access your current data. If something goes wrong with the new version, your original Agent Zero is still running with all your data intact.