Documentation
Installation
Installing from a desktop environment? Start with Agent Zero Launcher. Already in a terminal? Use A0 Install—or Docker if it is already running.

Choose your environment
Use Agent Zero Launcher by default. If you are already working in a terminal—locally, over SSH, or on a server—use A0 Install or direct Docker instead.
Start with Agent Zero Launcher
Agent Zero Launcher is the default and simplest guided path. Download the app for your platform, open it, and let it check Docker or set up a runtime before it installs Agent Zero.
| Architecture | macOS | Linux | Windows |
|---|---|---|---|
| x64 | Mac Intel | Linux x64 | Windows x64 |
| ARM64 | Mac Apple Silicon | Linux ARM64 | Windows ARM64 |
See the A0 Launcher v1.3 release for release notes and updater metadata.
Use A0 Install or direct Docker
Run A0 Install from any terminal, including SSH sessions and server shells. It reuses an existing Docker-compatible runtime or can help set one up. If Docker is already running, choose the Docker tab to start Agent Zero directly.
Headless or scripted setup: Quick Start mode creates one Instance and exits without opening installer menus.
curl -fsSL https://bash.agent-zero.ai | bash -s -- --quick-start --name agent-zero --port 5080& ([scriptblock]::Create((irm https://ps.agent-zero.ai))) -QuickStart -Name agent-zero -Port 5080
Add --skip-runtime-setup or -SkipRuntimeSetup when Docker must already be working and the installer should not try to set up a runtime.
- Command-line install path
- Docker reuse before runtime setup
- Moves directly into first-run onboarding
Answer the first-run prompts
Launcher and A0 Install are designed to get you to a running instance quickly. Depending on your platform and existing Docker setup, they may ask you to confirm or choose:
- Docker installation or permission steps if Docker is not ready yet
- The local port Agent Zero should use
- Authentication credentials for the Web UI and remote access
You can revisit authentication settings later from Settings > External Services > Authentication.
Open the Web UI
When installation completes, the CLI prints the local address for your instance. Open that address in your browser, usually http://localhost:<PORT>, and continue the onboarding flow there.
Add host control with A0 CLI
Agent Zero runs in Docker by default. If you want it to work on files on your own computer, run commands in your host terminal, or use your host browser profile, install A0 CLI on the host machine before you configure models.
Install A0 CLI on this computer
Run the command for your platform in your host terminal or PowerShell, not inside the Agent Zero container. After it connects, Agent Zero can request access to local files, terminal execution, and Bring Your Own Browser workflows.
For the full setup path, open the A0 CLI Connector guide.
Configure models and providers
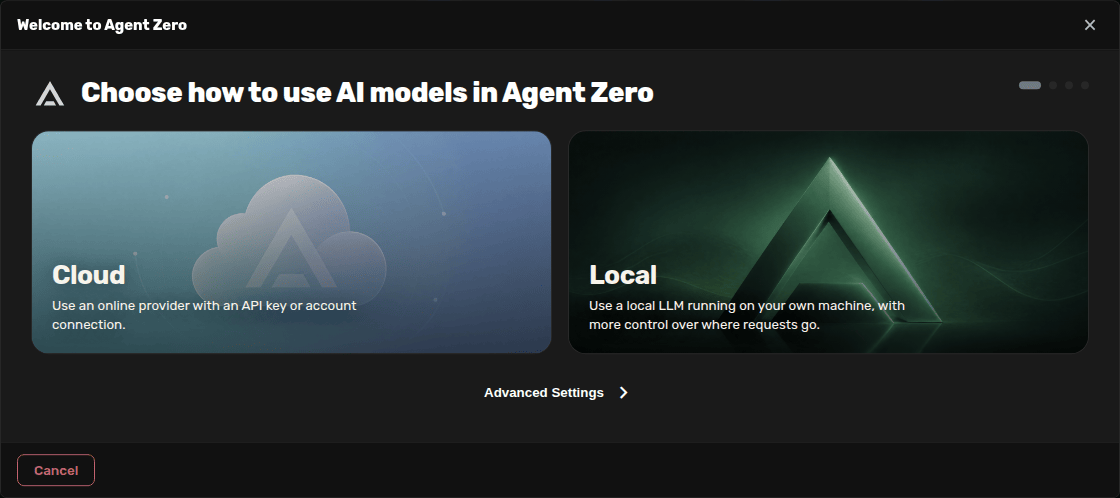
Once the Web UI opens, finish onboarding by connecting at least one model provider. Use the guided onboarding prompt if it appears, or open the same flow again from Settings later. The goal is simple: choose Cloud, AI account, or Local access, then pick your main and utility models.
Complete the onboarding wizard
- Choose Cloud for OpenRouter, our proxy API, Anthropic, OpenAI, Google, Venice, or another hosted provider.
- Choose AI account for Codex/ChatGPT, GitHub Copilot, Google Cloud Gemini, or xAI Grok sign-in.
- Choose Local for Ollama, LM Studio, or another model server running on your machine.
- Pick the provider, paste the API key if that provider requires one, then choose the main model.
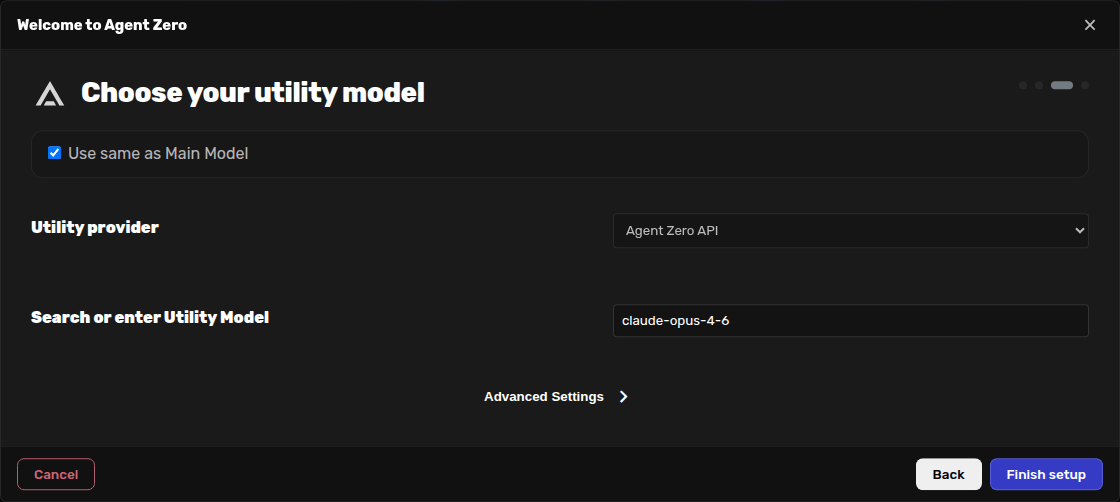
- Choose the utility provider and model for quick internal tasks such as summaries, naming, and memory.
- Click Finish setup, then start chatting.
Good default: use a capable main model for chat and a small, fast utility model for internal work.
For the full screenshot walkthrough, open the First-Run Onboarding guide.
Run local models
Cloud providers are the fastest way to get started. If you want privacy-first or offline operation, run a local model server on the host machine and point Agent Zero at it from the same model configuration flow you used above.
Ollama
Great default for local inference. It is simple to install and works well for most self-hosted setups.
LM Studio
Good if you prefer a desktop app workflow and want to use its OpenAI-compatible local server.
Ollama quick path
- Windows/macOS: install Ollama from ollama.com
- Linux: run
curl -fsSL https://ollama.com/install.sh | sh
# Start with a practical general model
ollama pull llama3.2

# Optional smaller variant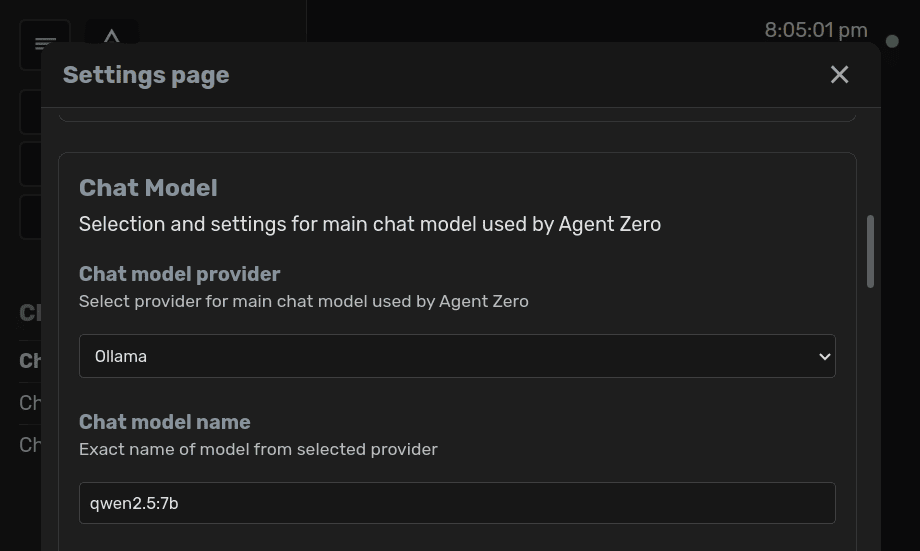
ollama pull llama3.2:1b- Open the model configuration screen in Agent Zero.
- Select Ollama as the provider for the model slot you want to change.
- Use
http://host.docker.internal:11434as the base URL. - Enter the local model name, then save.
Note: do not use localhost or 127.0.0.1 in Agent Zero for a model server running on the host. From inside Docker, those addresses point back to the Agent Zero container. Use host.docker.internal when available, or the Docker host gateway address such as 172.17.0.1 on the default Linux bridge.
For LM Studio, enable its local API server and use the same model configuration flow. If LM Studio shows a localhost URL, replace the host part with the Docker-reachable host address before saving it in Agent Zero.
If a local server only listens on 127.0.0.1 on the host, Docker still cannot reach it. Configure the server to listen on a Docker-reachable address, such as 0.0.0.0, and keep the port limited to trusted clients.
Understand the model roles
Chat model
The main reasoning model used for conversation, planning, and most higher-value work.
Utility model
Helper model for faster supporting tasks. You can keep it on the same provider at first.
Embedding model
Powers memory and knowledge indexing. Changing it later can trigger reindexing work.
Data persistence and backups
Your running container can be replaced or recreated over time, so think about data before you upgrade or experiment. The safest default is still the built-in backup flow.
Option 1: Backup and Restore
- Open Settings -> Backup & Restore.
- Create a backup and keep the file somewhere safe.
- Restore that backup into a fresh installation or container when needed.
Option 2: Volume mapping
Use a Docker volume or bind mount only when you want a host-managed directory. Map a folder on your machine to /a0/usr inside the container.
docker run -d -p 50080:80 -v /path/to/local/folder:/a0/usr --name agent-zero agent0ai/agent-zero- Do not map the entire
/a0directory when upgrading. - Prefer one clean mapping to
/a0/usr. - Create a backup before major updates even if you already use volumes.
Network access and sharing
You can keep Agent Zero local, expose it to devices on your network, or share it over the internet once authentication is enabled.
Local network
- Find your computer IP address with
ipconfigon Windows orifconfig/ip addron macOS and Linux. - From another device on the same network, open
http://your-ip:your-port. - Example:
http://192.168.1.100:50080.
Internet access
- Enable authentication first.
- Open the tunnel or sharing section in Settings.
- Create a tunnel and use the generated URL or QR code.
For more detail, the separate Sharing guide expands on network access and safe collaboration.
Security reminder: never expose the instance to the internet without Web UI authentication enabled.