Documentation
Agent Zero Launcher
Agent Zero Launcher is the desktop app for installing, running, switching, and opening Agent Zero Instances without starting from Docker commands.
Download it from the A0 Launcher v1.8 release, then open the app and let it check your local runtime.
Start Fresh On A New Machine
- Open Agent Zero Launcher.
- When Host access onboarding appears, choose safe defaults or select Skip. Nothing is shared until you opt in.
- If Docker is not reachable, follow the setup dialog.
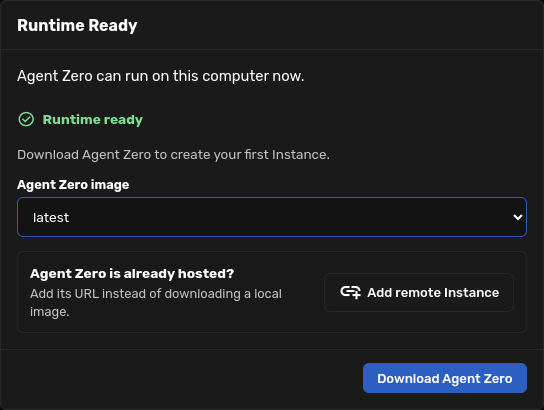
- If Agent Zero already runs on a VPS or another computer, choose Add remote Instance.
- After the runtime is ready, download or run Agent Zero from Versions.
- Open the Instance Web UI and complete onboarding.
Runtime Setup
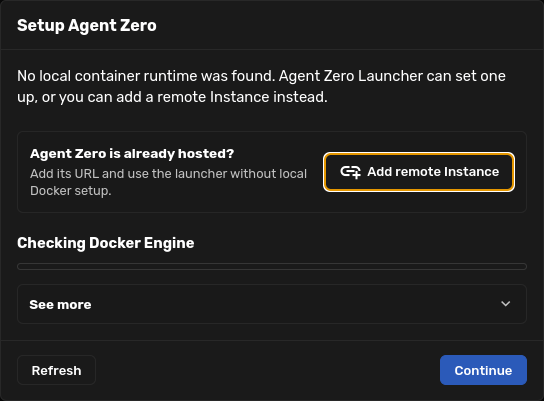
On a fresh machine, Launcher first checks whether a local container runtime is available. If it is missing or stopped, the setup dialog keeps the decision focused: continue setup, refresh after starting Docker yourself, or add an existing remote Agent Zero URL.
Versions
Versions is the image download and run page. It shows the rolling latest and ready cards first, then pinned Agent Zero releases such as v2.2, v2.1, and v2.0.
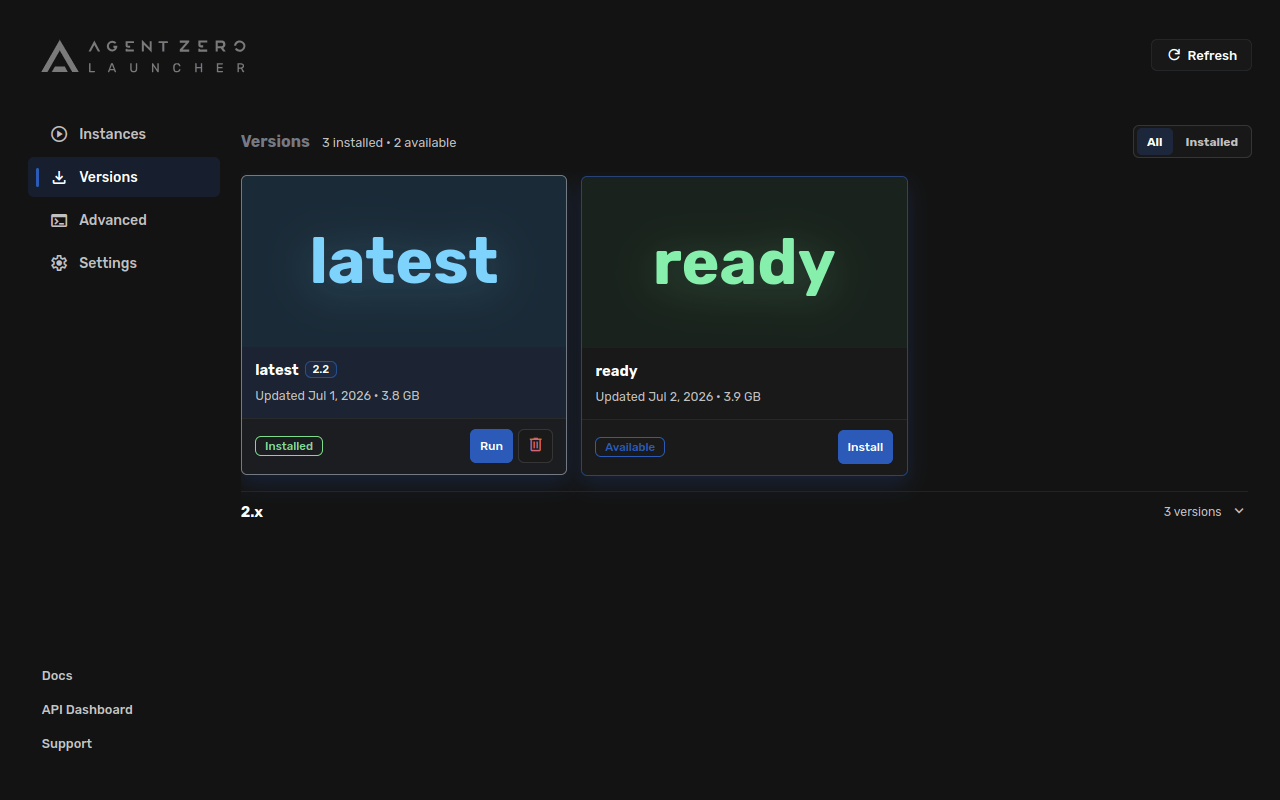
| Card | Meaning |
|---|---|
| latest | Tracks the newest published Agent Zero release image. |
| ready | Tracks the development-ready image when you intentionally use that branch. |
| Version cards | Pinned release images such as 2.1, 2.0, or older release lines. |
| Install | Downloads that image. |
| Update | Refreshes an installed image when a newer build is available for that card. |
| Run | Starts an installed image as a local Instance. |
Create A Local Instance
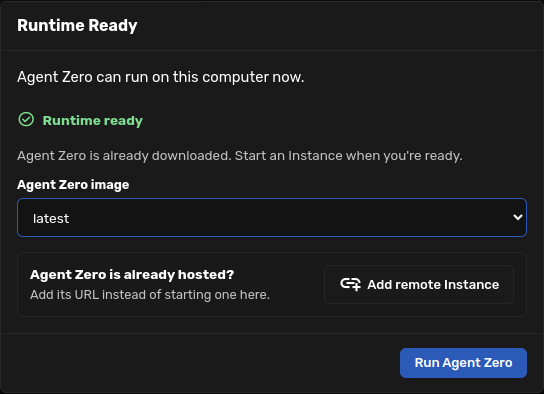
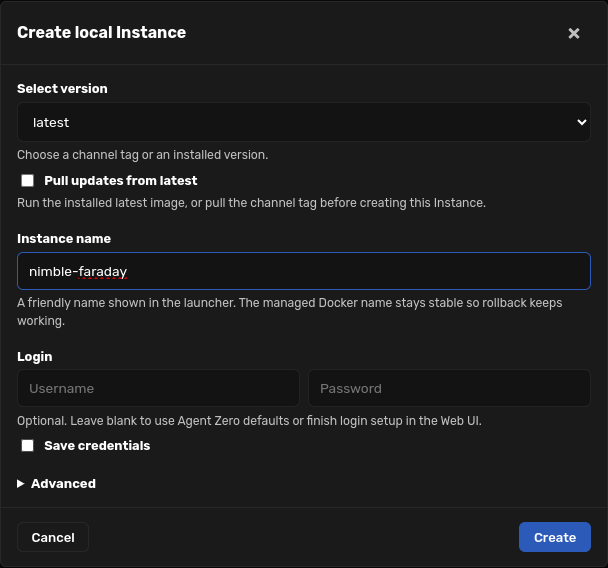
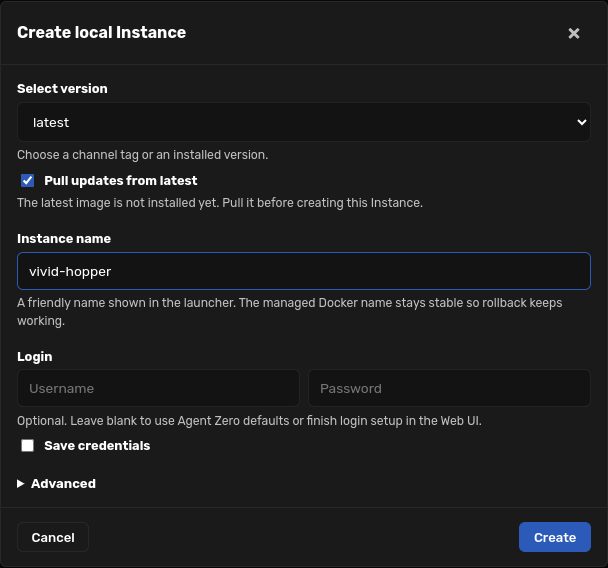
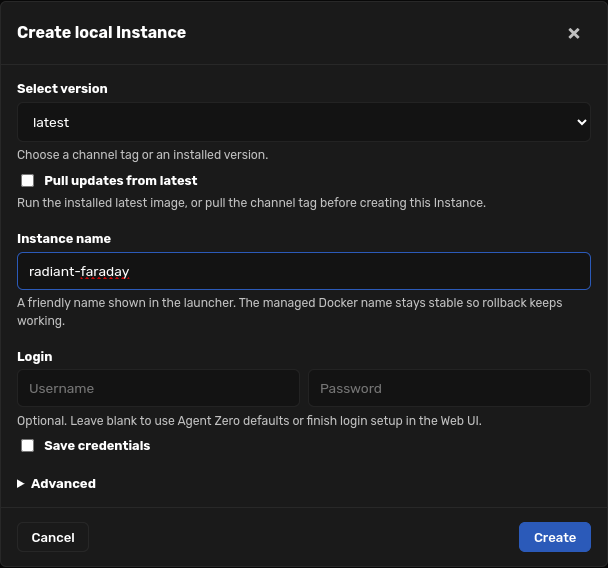
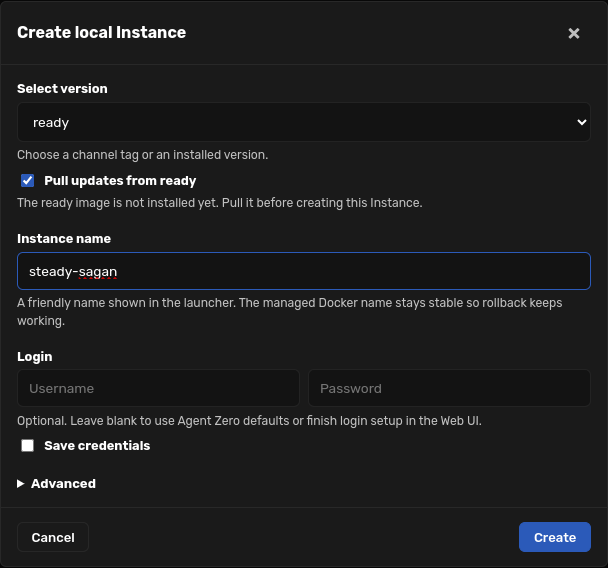
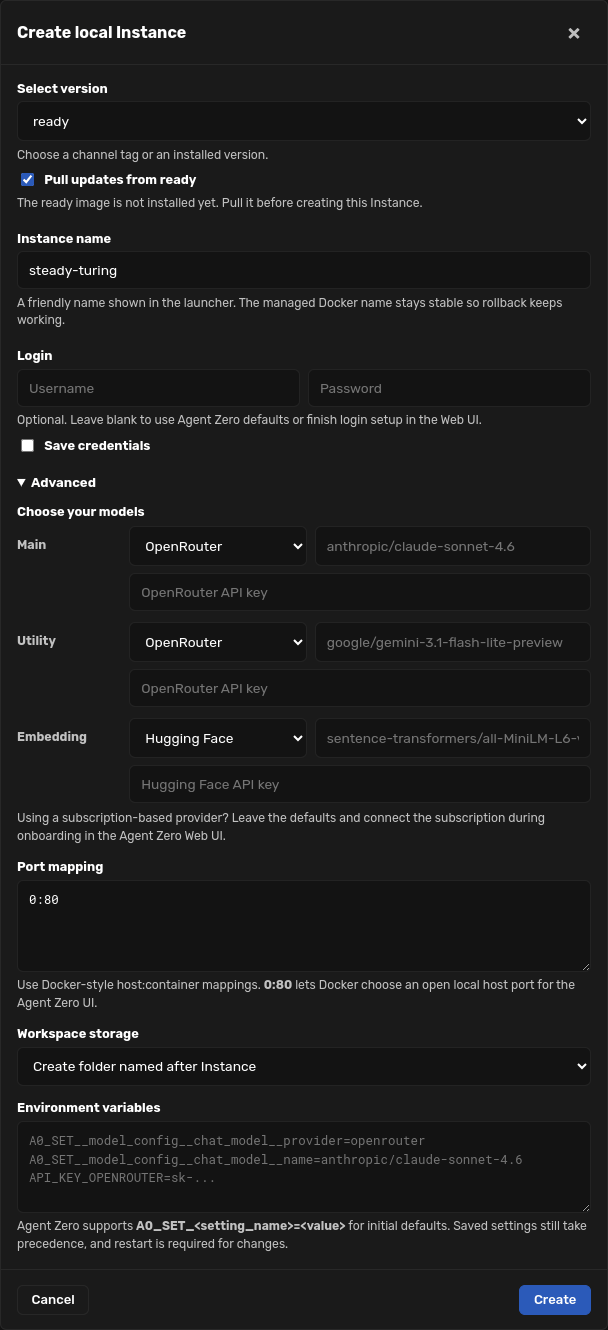
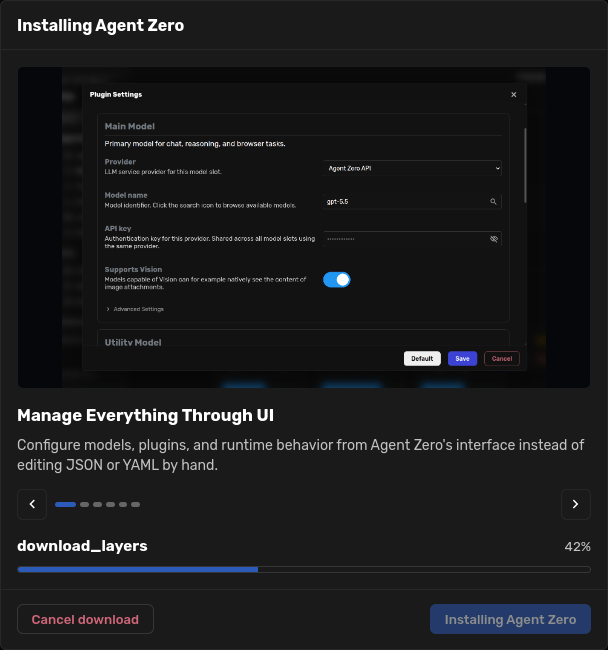
On a first run, Launcher may offer Run Agent Zero when an image is already downloaded, or Download Agent Zero when it needs the image first. Both paths open the same Create local Instance dialog.
Add A Remote Instance
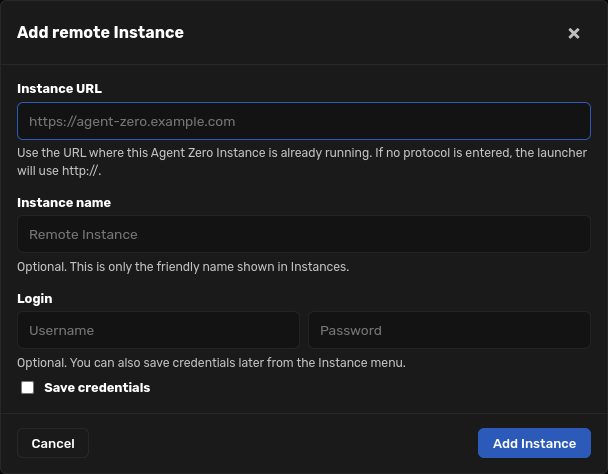
Remote Instances are a first-run path. Add the URL for an Agent Zero already running on a VPS or another computer, then open it from the same Instances view as local containers.
Instances
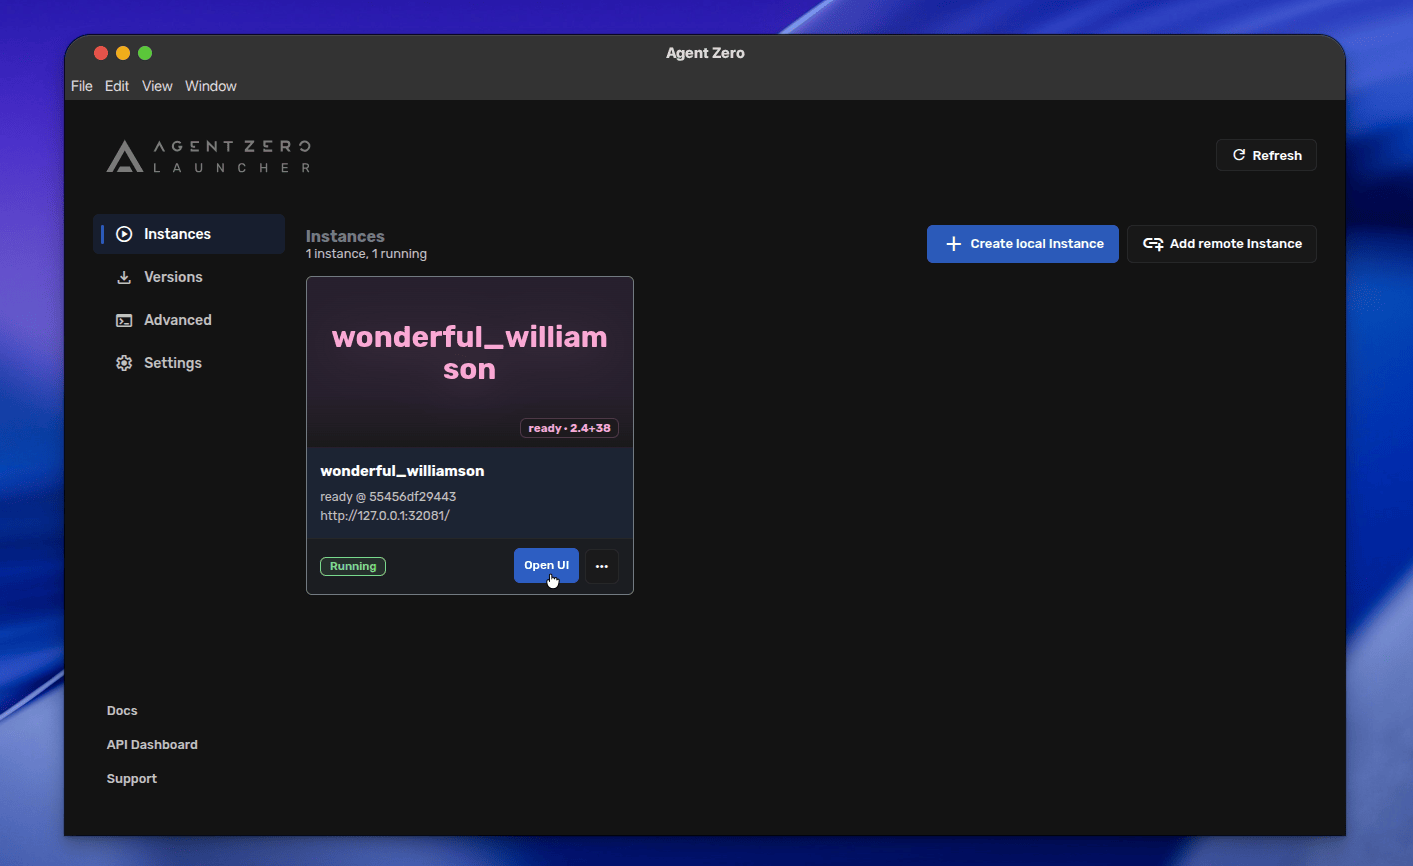
Open Instances after you run Agent Zero. Instance cards hold local containers and saved remote URLs.
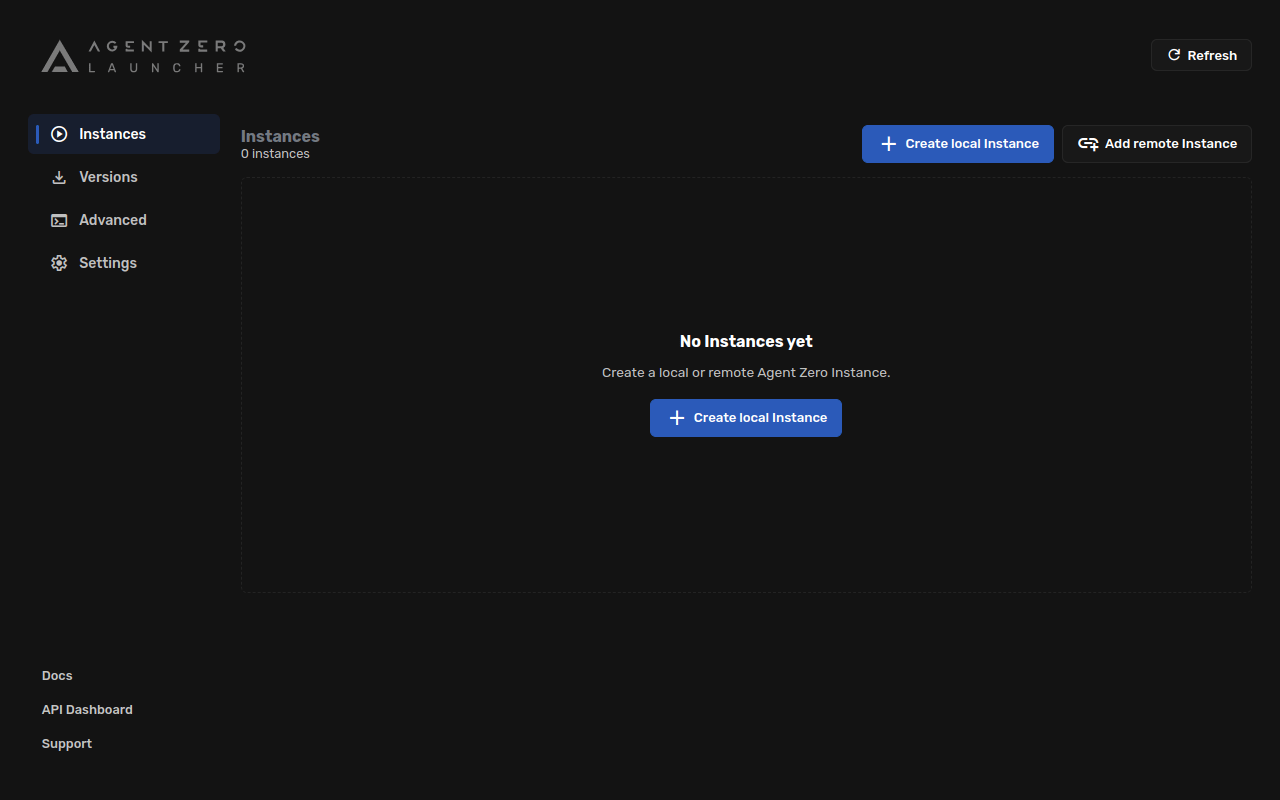
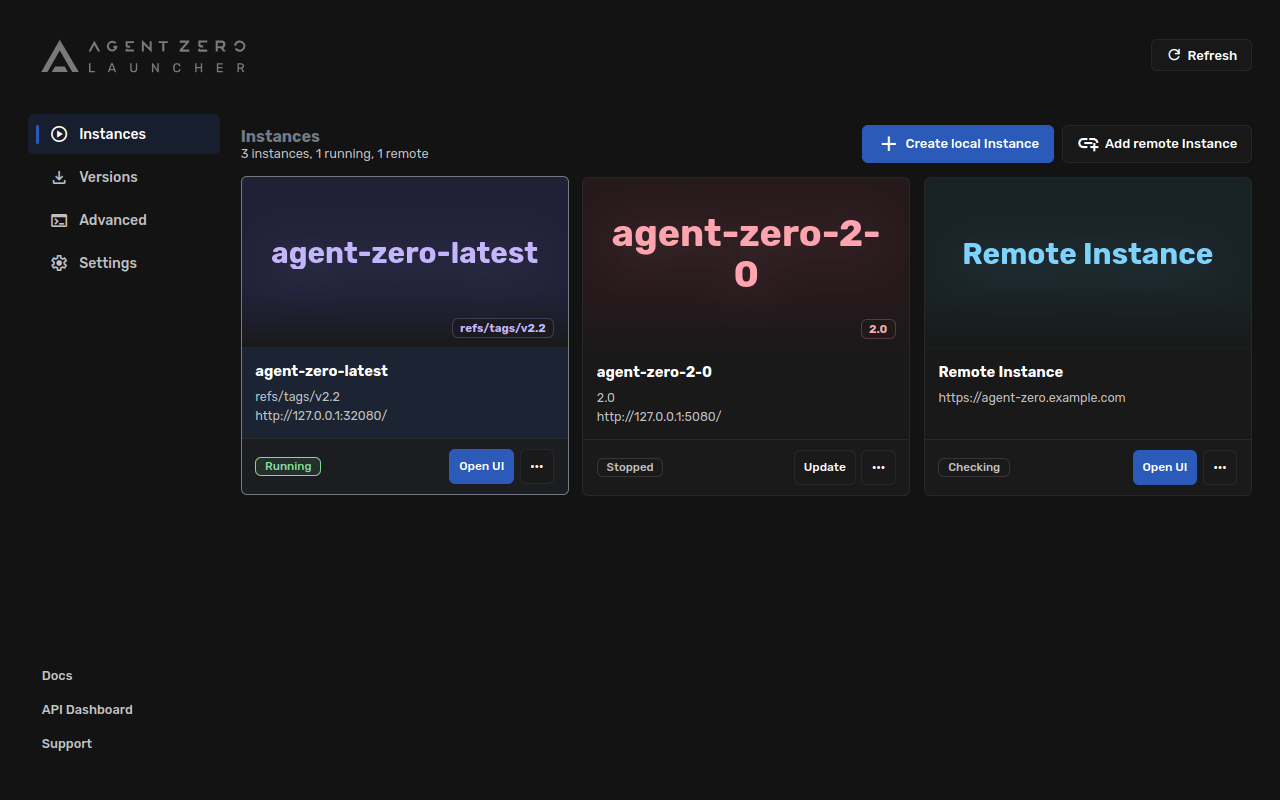
- Open UI opens the Agent Zero Web UI from the Instance card.
- Start, Stop, Rename, and Delete act on that Instance.
- See logs and storage actions stay with the Instance they affect.
- Backup
/a0/usrdownloads the same user-data backup zip you can create from Agent Zero Core. - Restore
/a0/usrrestores that backup zip into the selected Instance. - Open A0 CLI opens a terminal connection for an available Instance. If it is missing, the Instance menu offers Install A0 CLI.
Host access
Host access lets an open Agent Zero Instance use selected parts of the computer running Launcher: a folder for files, terminal commands, a supported browser profile, and—only if you allow it—Computer Use. It works with local and saved remote Instances that support Launcher Host access.
Host access starts off. Use it only with an Instance you trust, enable the smallest set of permissions for the task, and enable Browser or Computer Use only when you need them. A remote Instance never receives access implicitly.
First-time onboarding
The first time Launcher starts, it asks for defaults for new local Instances. You can skip the step, leave access off, or turn it on and choose the starting permissions. These are defaults only: each open Instance can be changed later.
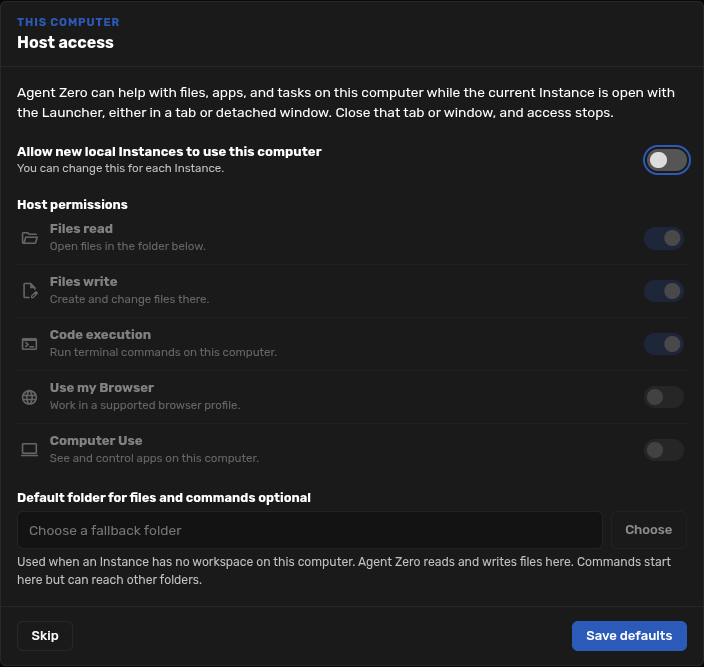
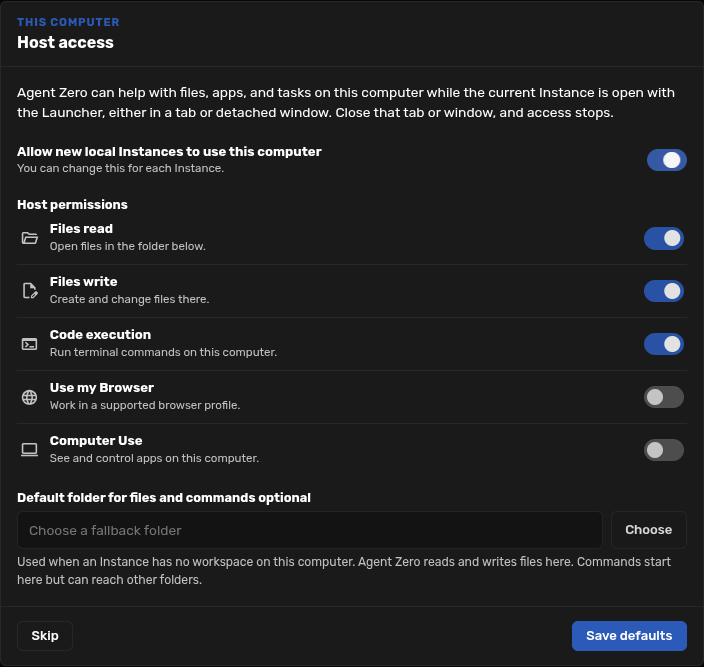
Launcher checks the supporting A0 CLI in the background. If the Host access panel reports a compatibility issue, update Launcher or the Agent Zero Instance, then try again.
Open and configure Host access
- In Instances, select Open UI.
- In the Launcher tab bar, select the computer icon next to the Instance name.
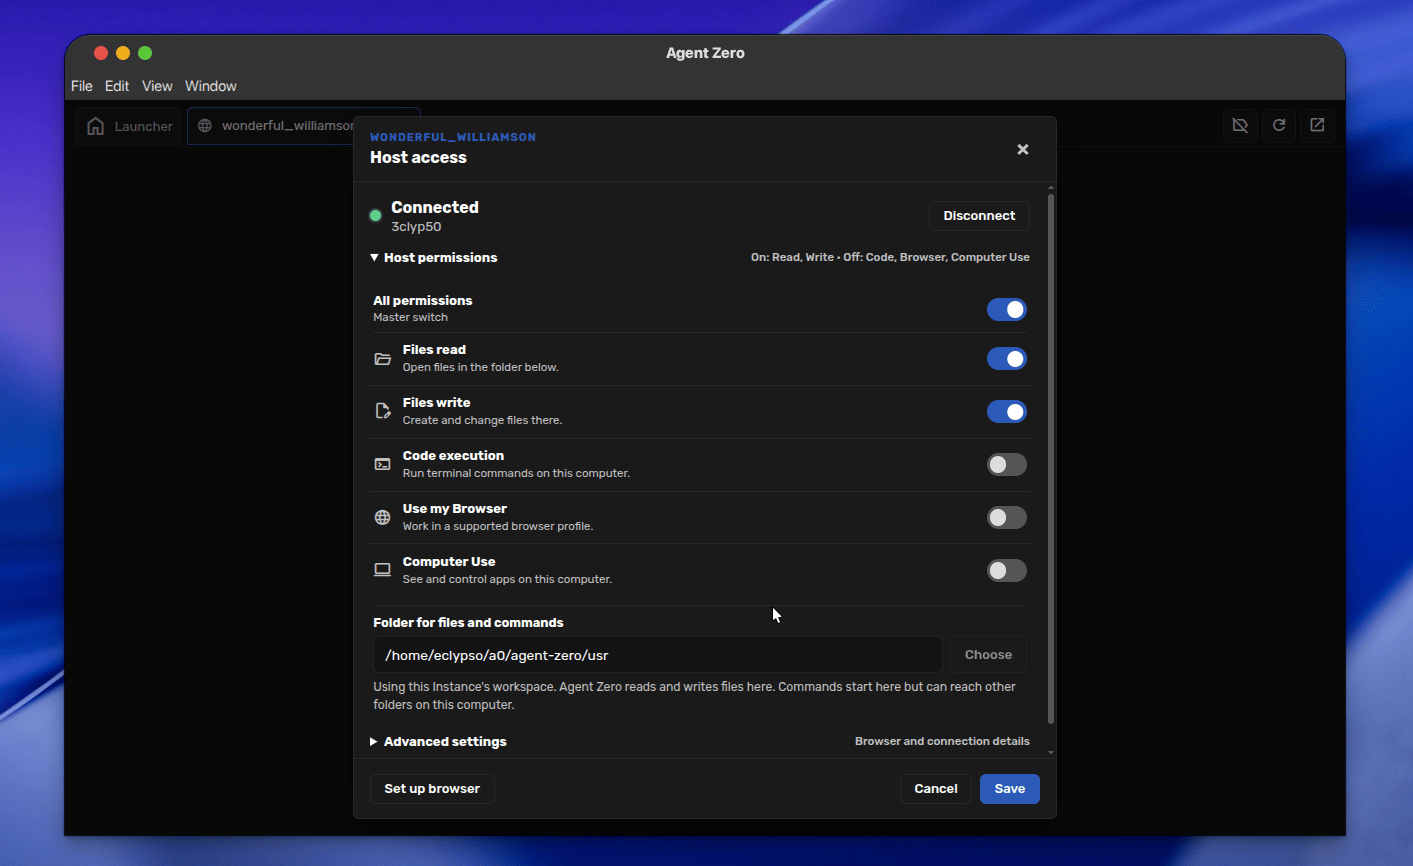
- Turn on All permissions, choose the folder when needed, expand Host permissions, then select Save.
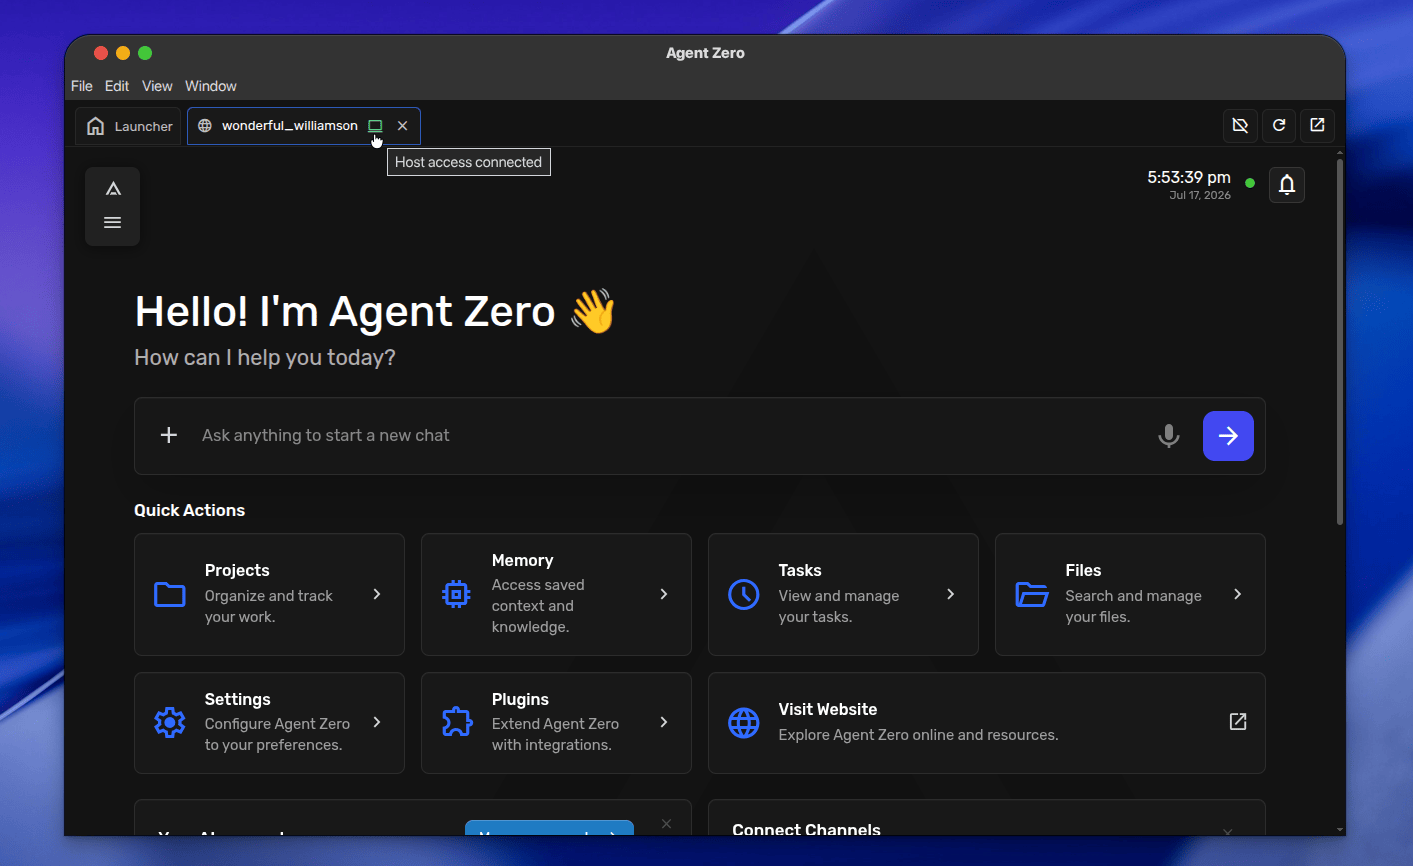
The connection belongs to that open Launcher tab. Detaching the tab keeps the same connection; closing its tab or detached window stops Host access.
Choose only the permissions you need
The master switch pauses or enables every permission for that Instance. Files write requires Files read, and Code execution requires Files write.
| Permission | What it allows |
|---|---|
| Files read | Open files in the selected folder. |
| Files write | Create and change files in that folder. Requires Files read. |
| Code execution | Run terminal commands from the selected folder. Commands can also reach other locations available to the Launcher user. Requires Files write. |
| Use my Browser | Work in a supported browser profile on this computer. |
| Computer Use | See and control apps on this computer. |
Use my Browser
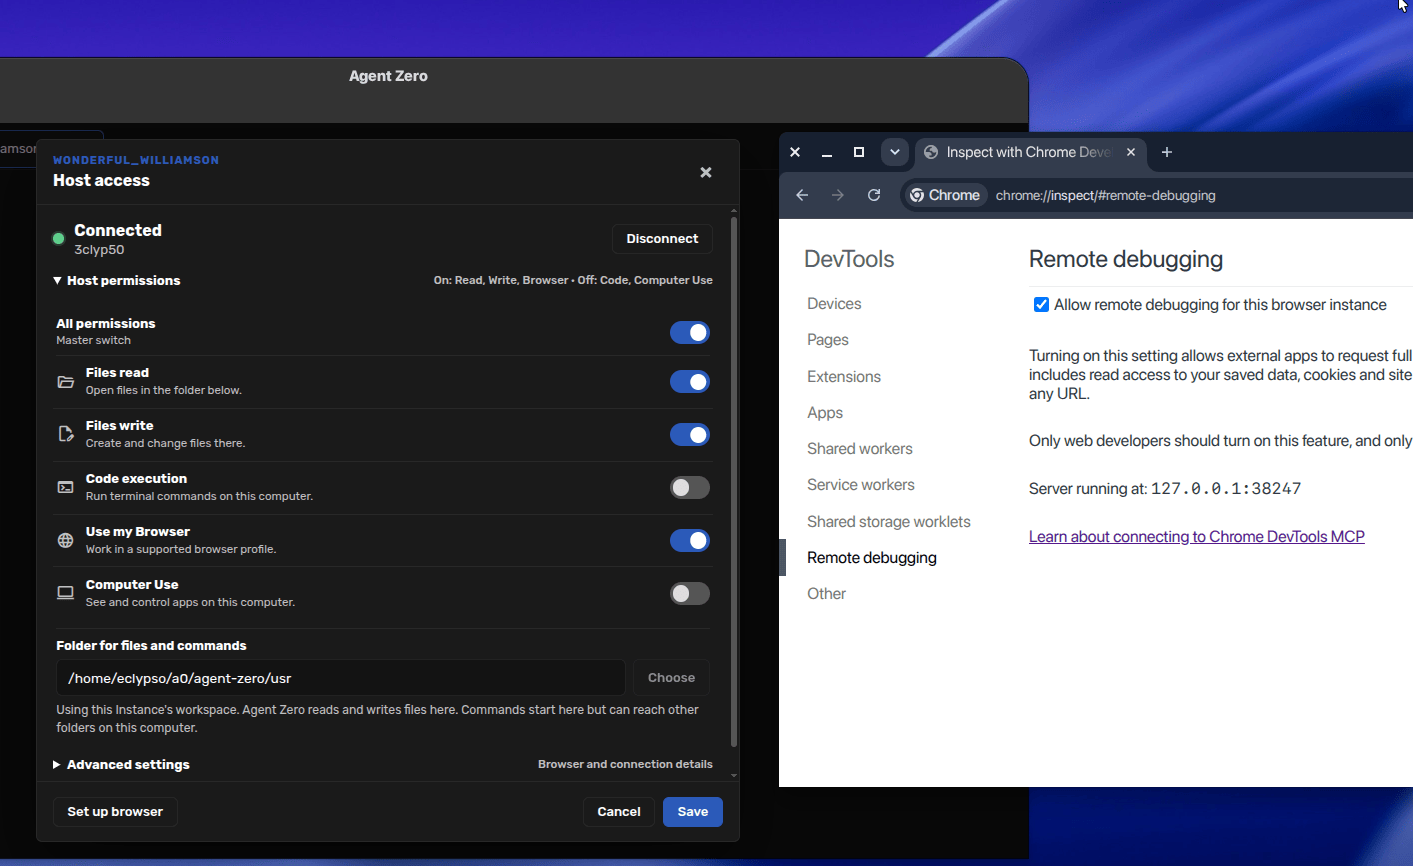
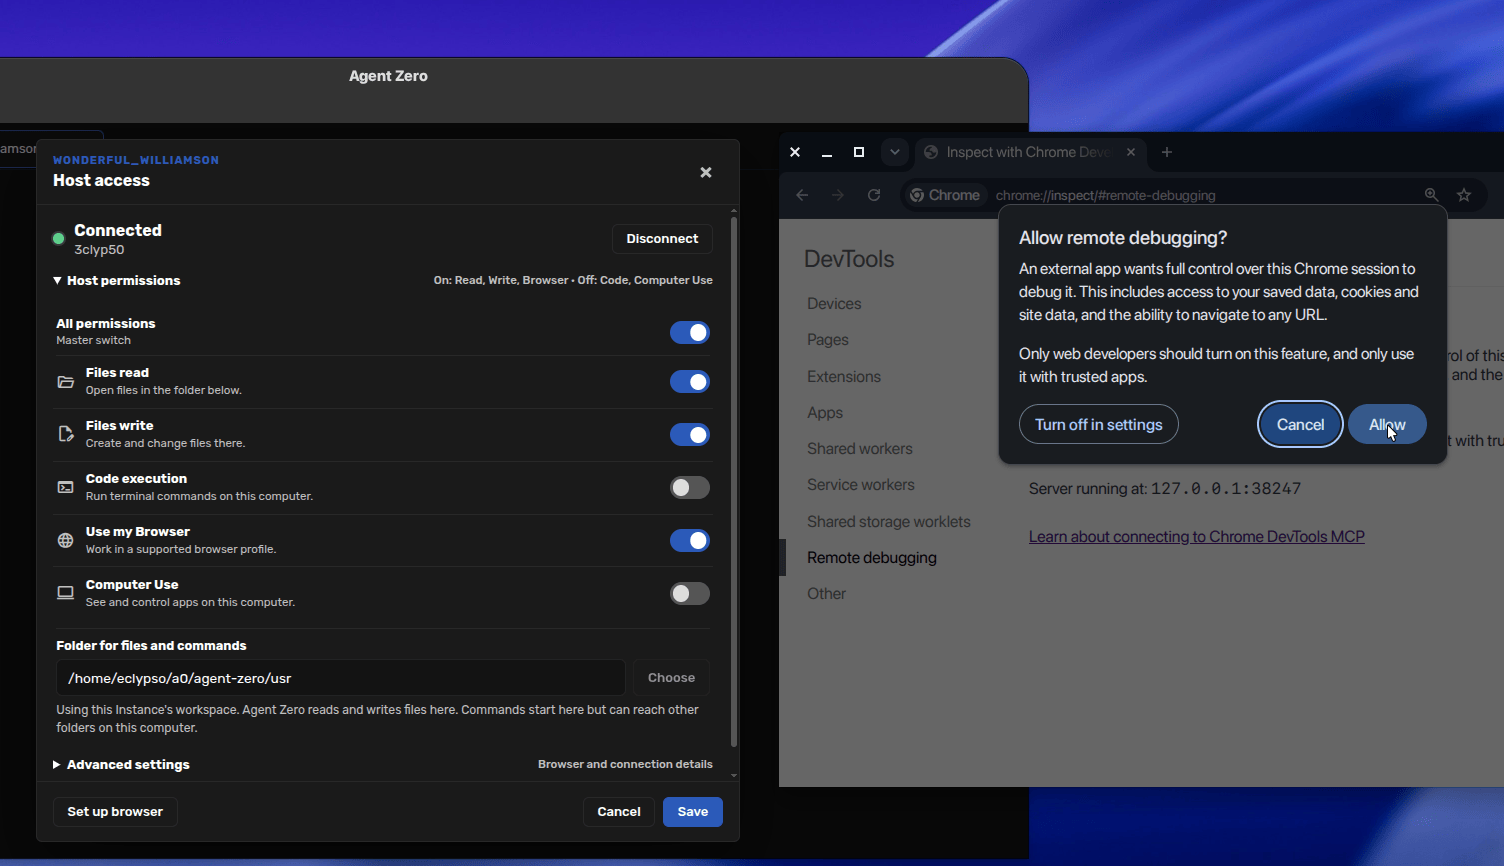
Enable Use my Browser and save the settings. In Advanced settings, select Set up browser. Launcher opens the browser's remote-debugging page; turn on Allow remote debugging for this browser instance and accept the browser confirmation.
Important: remote debugging can access the selected browser session, including page data and cookies. Use it only with a browser profile and Instance you intend to share with Agent Zero.
Computer Use
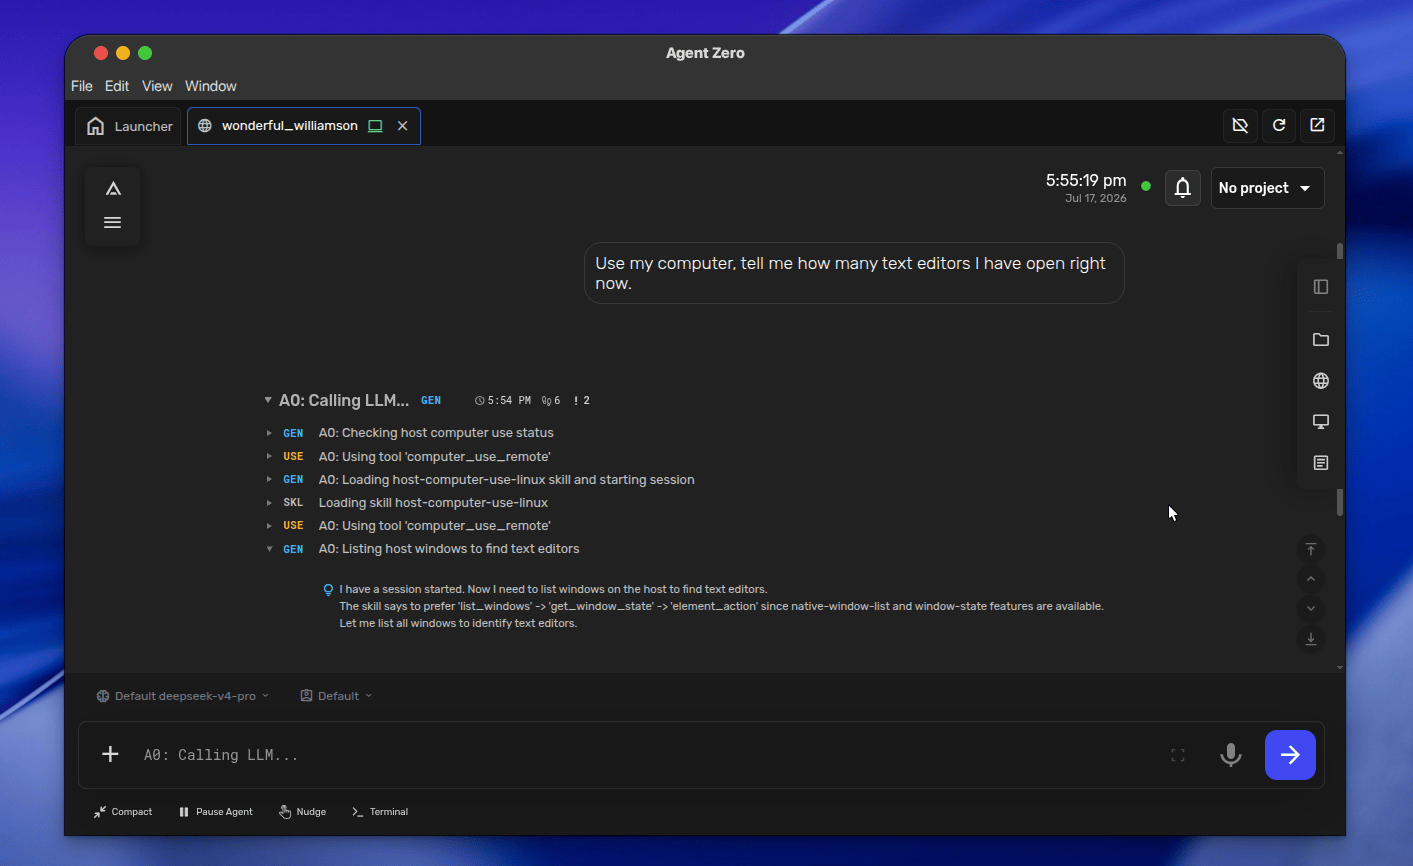
Enable Computer Use only when the task needs Agent Zero to see or operate applications on your desktop. If the Host access panel says Needs action or Permission needed, follow the system permission prompt, then return to the panel.
Important: Computer Use can see the desktop and control apps with clicks, typing, and scrolling. Keep it off for normal chat and turn it off again when the desktop task is complete.
Disconnect when you are done
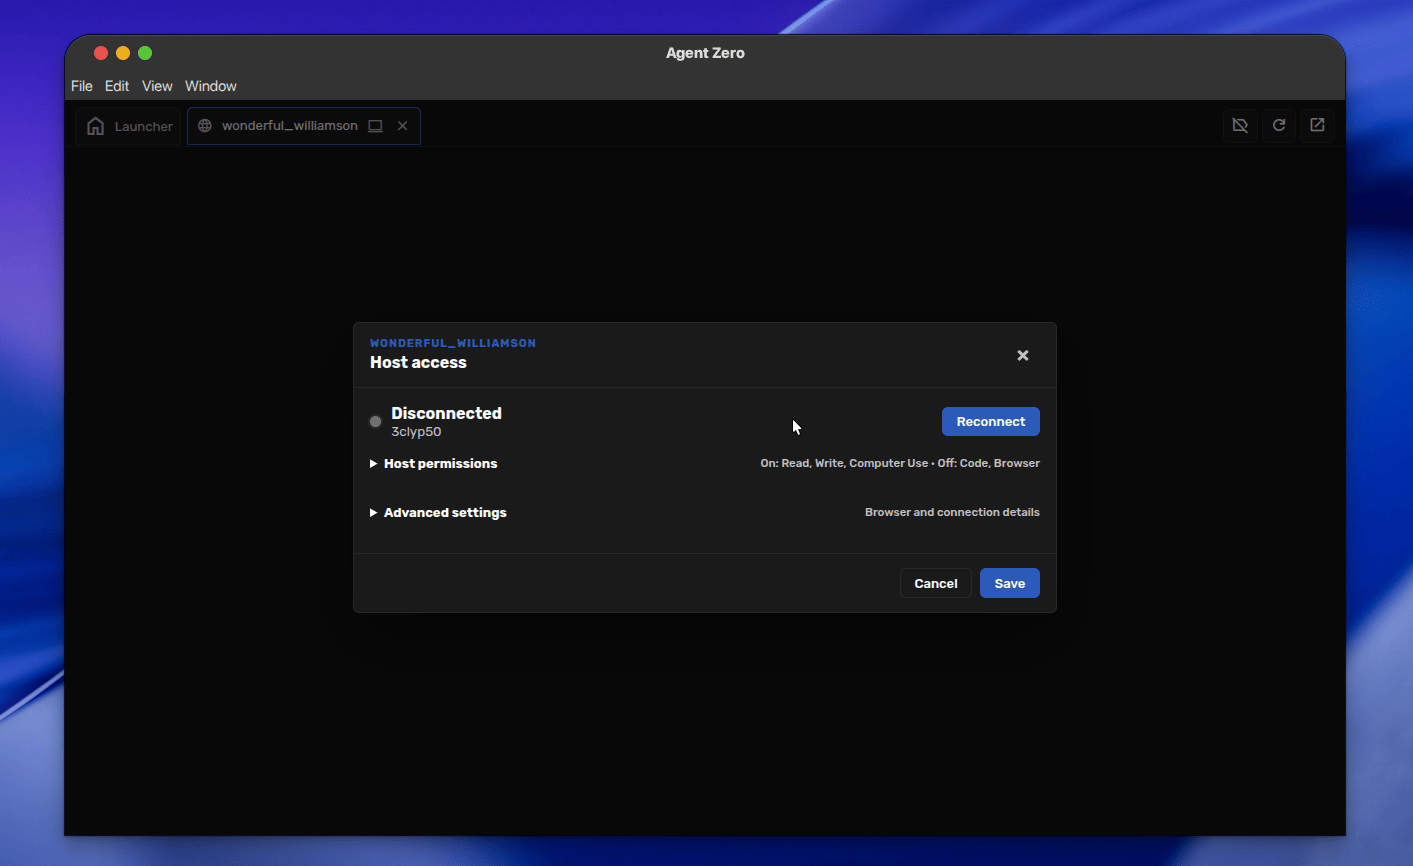
Open the computer icon again and select Disconnect. The panel switches to Disconnected; select Reconnect only when you need Host access again. Closing the Instance tab or its detached Launcher window also stops the connection.
For a terminal-first workflow, see the A0 CLI Connector guide.
Updating With Launcher
Update Agent Zero Images
Use Web UI Self Update for same-major Agent Zero updates. For a major image jump such as v1.20 to v2.0, use Backup /a0/usr on the old Instance, run the v2.0 image from the latest card in Versions, then use Restore /a0/usr on the new Instance.
See the v1.20 to v2.0 update guide for the conservative backup-first path.
Update The Launcher App
When a Launcher app update is available, start Launcher and click the Update button that appears at startup. If you skip it, you can close and reopen Launcher, or simply update the next time you run it.
During the download, Launcher shows progress on the startup screen. Let the download finish, then continue into the app normally.