Documentation
Use OpenCode Go with Agent Zero
OpenCode Go is available through a community provider plugin. If you cannot find it in the Cloud provider grid, open the Plugin Hub from that same screen, install OpenCode Go, and choose its models in Advanced model configuration.
This guide starts with a fresh Agent Zero instance. The same route helps you find other providers supplied as plugins.
Before you start
You can install the plugin and explore the settings without a subscription. To send messages through Go, you need your own OpenCode API key and an active OpenCode Go subscription. You do not need to install the OpenCode app to use this provider in Agent Zero.
The screenshots below stop at model configuration, with the key fields empty. Installation and model selection were checked with OpenCode Go plugin 0.1.4; model responses were not tested.
1. Send your first message
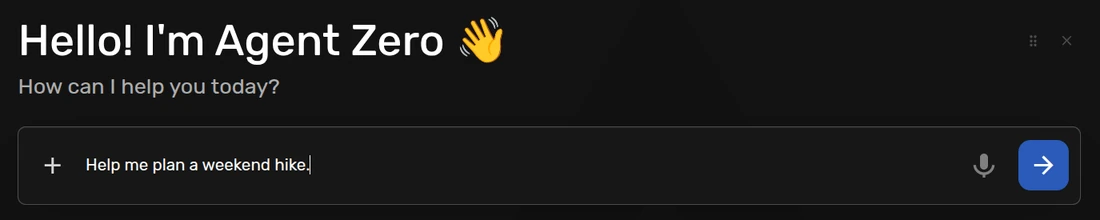
Open Agent Zero and type a message in the welcome screen's composer. For example: Help me plan a weekend hike. Click the arrow to send it.
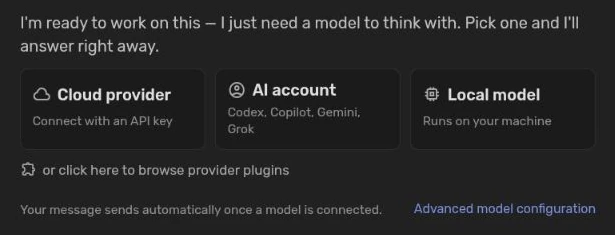
Agent Zero opens a chat and holds your message while you choose a model. Click Cloud provider.
2. Find the provider-plugin link
OpenCode Go is not in the Cloud grid. Scroll to the bottom and click the puzzle link: Didn't find your provider? Click to look in the Plugin Hub.
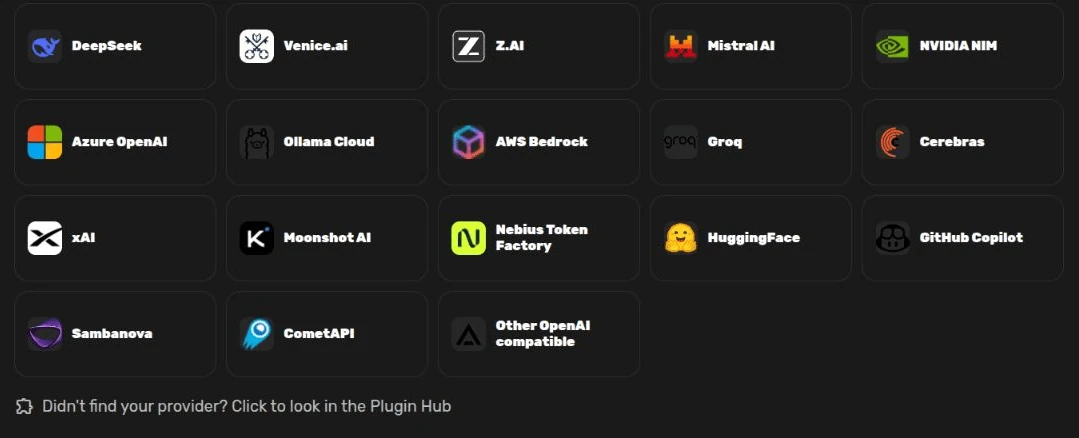
The Account and Local tabs have the same link. You can also go straight to the Hub using or click here to browse provider plugins below the three choices in the chat.
3. Install OpenCode Go
The Hub opens with Provider selected. Search for OpenCode, then open OpenCode Go by 3clyp50.
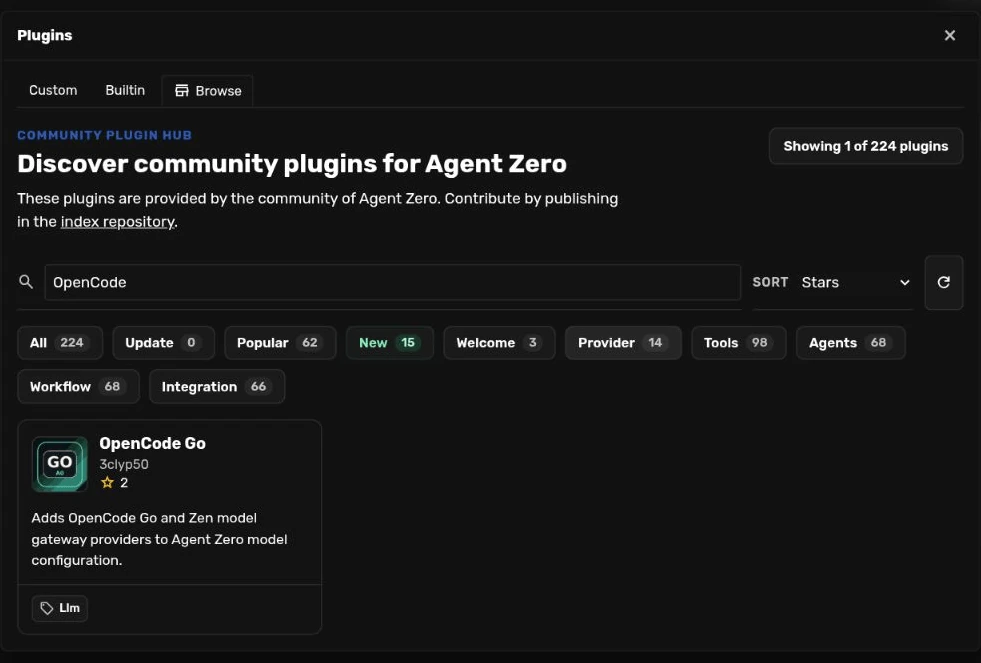
Read the description and README, and check the plugin's source. It adds both Go and Zen providers. This walkthrough uses Go.
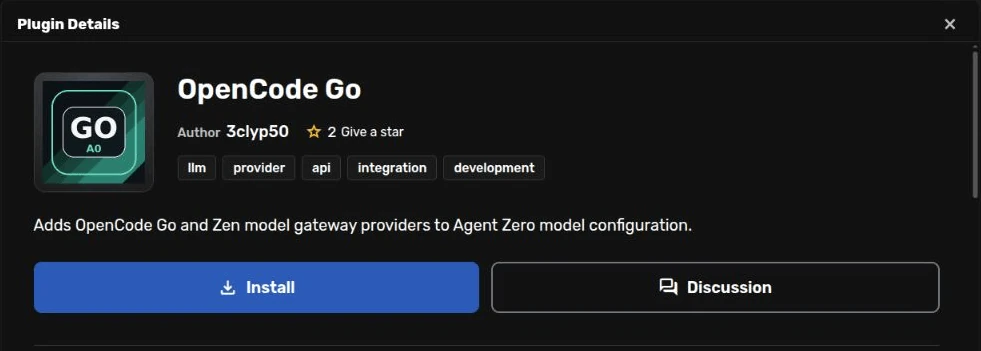
Click Install. Read the third-party plugin warning. If you trust the plugin, choose Install Anyway. Wait until the page shows Installed, then refresh Agent Zero in your browser.
If the plugin already says Installed, skip installation and refresh the page. You do not need to reinstall it.
4. Choose the Main model
Return to your chat. The held message and setup choices remain after the refresh. Click Advanced model configuration at the bottom of the setup message. This opens Edit Model Presets.
Leave Preset set to Default for this first setup. In Main Model:
- Set Provider to OpenCode Go (GLM/Kimi/DeepSeek/MiMo). Choose it by name; the other OpenCode entries serve different model groups or Zen.
- Replace the old Model name with
glm-5.3. You can type it or use the search icon and select it from the list. Changing the provider alone does not clear the previous model name. - When you are ready to connect, paste your OpenCode key into API key.
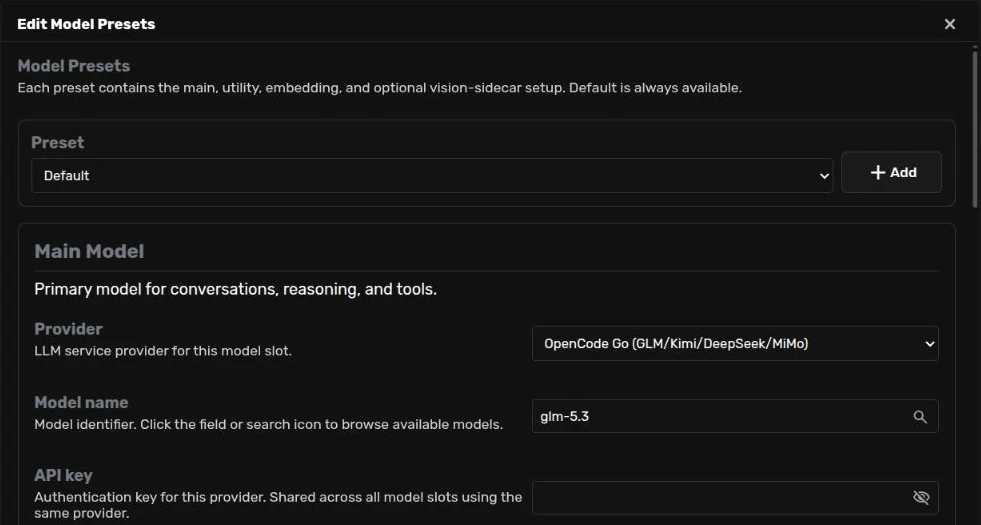
This example is for text chats. Turn Supports Vision off and leave the separate vision settings empty for now. You can configure image analysis later in Model Presets.
5. Choose the Utility model
Scroll to Utility Model. This model handles short background tasks such as
summaries and chat names. Choose the same Go provider, then replace the old
model name with glm-5.3-flash.
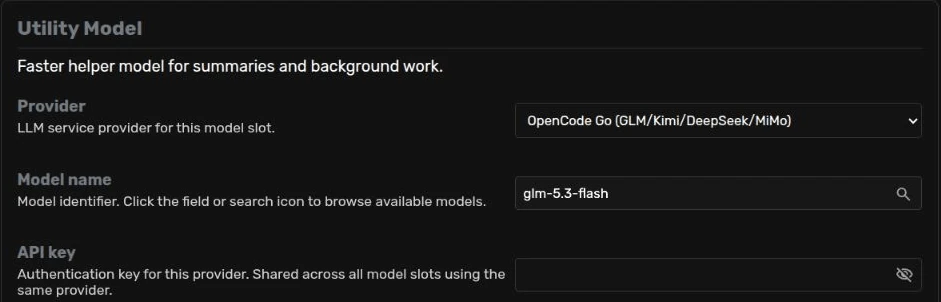
| Section | Model name |
|---|---|
| Main Model | glm-5.3 |
| Utility Model | glm-5.3-flash |
These are the IDs shown by Agent Zero's model picker and
OpenCode's Go model list. Enter them
exactly, without a zai/, open/, or opencode-go/ prefix.
The free glm-5.3-flash-free model is a different offering. OpenCode's
Console documentation says its free
chat models require the OpenCode client. Use the Go model above for this setup;
it is covered by your Go access, not a free Utility model.
Both sections share the API key when they use the same provider. Leave the
fresh instance's Embedding Model set to HuggingFace and
sentence-transformers/all-MiniLM-L6-v2.
6. Save when you are ready to connect
Check the provider, model names, and your key, then click Save. Return to the chat. Once the model is configured, Agent Zero can retry your held message automatically. Do not send it again while it is starting.
If you are only exploring and do not have Go access yet, click Close instead. The plugin stays installed, but the unfinished preset changes are not saved. Later, reopen Advanced model configuration from the chat. You can also open the preset menu above the composer and choose Edit Presets.
If something is missing
- No OpenCode provider in the editor: check that OpenCode Go is installed and enabled under Plugins → Custom, then refresh the browser page.
- A model is missing from the search results: check OpenCode's current model list and the plugin's updates. The Model name field also accepts an exact model ID typed by hand. Typing a name does not grant access to it.
- A key or access error: check the key and your Go subscription in the OpenCode console. Installing the plugin does not create an account or subscription.
- Looking for another provider: return to Plugins → Browse, select Provider, and search for its name. Follow that plugin's README for its provider choice, model names, and key requirements.
For the other setup routes, see First-Run Onboarding.